Sunday, 14 February 2016

Chrissie's Lent Blanket Week 1

Chrissie’s Lent Blanket

Crochet Pattern – Block stitch.
Instructions for this stitch can be found here:-


Lettering instructions found here:-


Yarn used any good quality 8ply Acrylic yarn

Main colours 2 different purples the colour of lent & white the colour of perfection and purity.


Instructions - Australian/English terms used.

Chain 141
Row 1: dc  into 2nd stitch from the hook continue to end in dc.
Row 2: chain 3, treble stitch into first dc from previous row and continue to end of the row
Rows 3: – 7 continue working in treble stitch working in the letters.
Row 8:  Treble to the end
Row 9  dc  into 70 trebles (from previous row) increase 1 stitch then work dc to end of row.
Row 10  Start block stitch pattern.

I am using the devotionals from this web site:-
I read the devotional meditate & think about it and what colour to use.

Lent Day 1: The Dust
10th February 2016
Genesis 3:14-19 (ESV)
Colour variegated brown yarn  representing dust & the serpent.


Lent Day 2: The Bow
11th February 2016
Genesis 9:8-17 (ESV)
Colour variegated rainbow yarn representing the rainbow.


Lent Day 3: The Darkness
12th February 2016
Genesis 15:7-12, 17-21 (ESV)
Colour Black representing darkness


Lent Day 4: The Test
13th February 2016
Genesis 22:1-14 (ESV)
Colour scarlet representing sacrifice


Sunday 14th February 2016
Sunday represents the sun. Yellow is the brightest colour of all colours. It is bright to engage and draw us to it.


Week 1 Progress


Friday, 22 January 2016

Temperature Blanket - 4 Seasons Blanket

Via the various Facebook Crochet/Knitting Groups I belong too I heard about the Temperature Blanket yarn along.

The idea was to start on January 1st 2016 and to crochet or knit a blanket.  (I prefer to crochet).  Each day add one row.  The colour of the row is to correspond with the high temperature in my location - Victor Harbor South Australia for that day.  At the end of the year I would have a blanket with 366 different rows!!

 People all over the world are committed to this project.  Initially I dismissed the idea.  Then  a friend who knows I have a passion for crocheting shared about the temperature blanket on my Facebook wall! At the time I said I thought it was an interesting concept but I wondered how much variation I would get with the weather the way it was so far in January.   Also I was concerned about deciding what pattern or stitch too do so the blanket would not end up too long and thinking that by the time 10 months had gone by it could be huge and  unwieldy  Any stitches using DC (Aust) or SC (US).in the overall pattern would be suitable linen stitch or moss stitch.

I experimented with small samples....tried linen stitch but the one different coloured with my chosen colours for January 2016  row looked 'lost' in the middle. Then I considered using treble stitch patterns such as the Basket Stitch, Shell Stitch,Waffle Stitch or Granny Stitch.
Anyway I decided on my colours ordered the yarn & waited. I ordered Stylecraft Special DK from here http://www.woolwarehouse.co.uk/

Here is my colour scheme....temperatures are in Celsius.

 I started keeping records of the daily temperatures on a calendar.

 I joined a Facebook group dedicated to the project.  https://www.facebook.com/groups/877544645667442/?fref=nf
I found myself  drooling over some of the lovely designs.  I still had some reservations on how big this project was going to be?
My yarn order arrived this week so time to make some plans and decisions.
What I have decided to do is a 4 Seasons Blanket.I am making 4 smaller blankets for each season then I will join them together at the end of the year.
I used this web site to find out the temperatures for the month of December 2015.. You can find out the temperatures from years gone by here:-

http://www.accuweather.com/en/au/victor-harbor/2267147/weather-forecast/2267147

I learnt from You Tube how to crochet using Intarsia to crochet in letters.  My plan is for each mini blanket to start with a section with the appropriate Season letters crocheted in,  I created a graph using Excel and learnt a bit more about the benefits of using Excel.  So here is my graph:-


Australia crochet terms used.

Pattern so far:-

Using Cloud Blue

Chain 141
Row 1 - DC to the end turn
Row 2 - Treble to the end
Row 3 -5 work in the letters in Matador & Jaffa.
Row 6 - Treble to end
Row 7 - DC to the end.
Start pattern according to the appropriate colour for the day.
The pattern I am using is called Diamond Stitch tutorial found here:-
http://happyinred.blogspot.nl/2013/11/diamond-stitch-blanket-crochet-pattern-tutorial.html

So this is my project so far:-


My plan is too maybe appliqued a 'sun' on the summer one, a leaf for Autumn, a flower for spring and a raindrop for winter next to the word.

I estimate the length of my blanket  to be six feet (three for each mini  one) which should be good on a Queen size bed.

I will keep this updated as I progress.


Finished Summer Blanket. I did a border in the lighter colour yellow (Citron) which was the dominant colour used.  Did one row all the way around in 1dc (Aus) 2chain evenly then around in the opposite direction doing 2 dc in each of the 2 chain spaces with an extra one in the corners.


Saturday, 21 November 2015

Chasing Rainbows Blanket

I recently purchased this lovely crochet pattern from http://www.feltedbutton.com/2015/02/wanna-chase-rainbow.html

However I wanted to make it a six colour rainbow blanket for a loved one for Christmas. So  I did deviate somewhat from the pattern making the stripes wider. It was easy enough to follow the original pattern & repeat some of the rows. I also crocheted the border a bit different using what is called 'linen stitch'. 
I did each of the stripes 6 rows & repeating the block of 6 colours 4 times using the following colours from Deramores:
Stylecraft Special DK - Magenta 
Stylecraft Special DK - Royal 
Stylecraft Special DK - Green 
Stylecraft Special DK - Jaffa 
Stylecraft Special DK - Sunshine 
Stylecraft Special DK - Matador 
The border all the above colours plus:-
Stylecraft Special DK - White


I enjoyed the challenge of attempting something new and grateful to people who design and share their patterns.  I am very pleased with how it turned out and just love using Stylecraft Special DK it is so soft and a pleasure to crochet with.


Thursday, 18 December 2014

Creative Cards

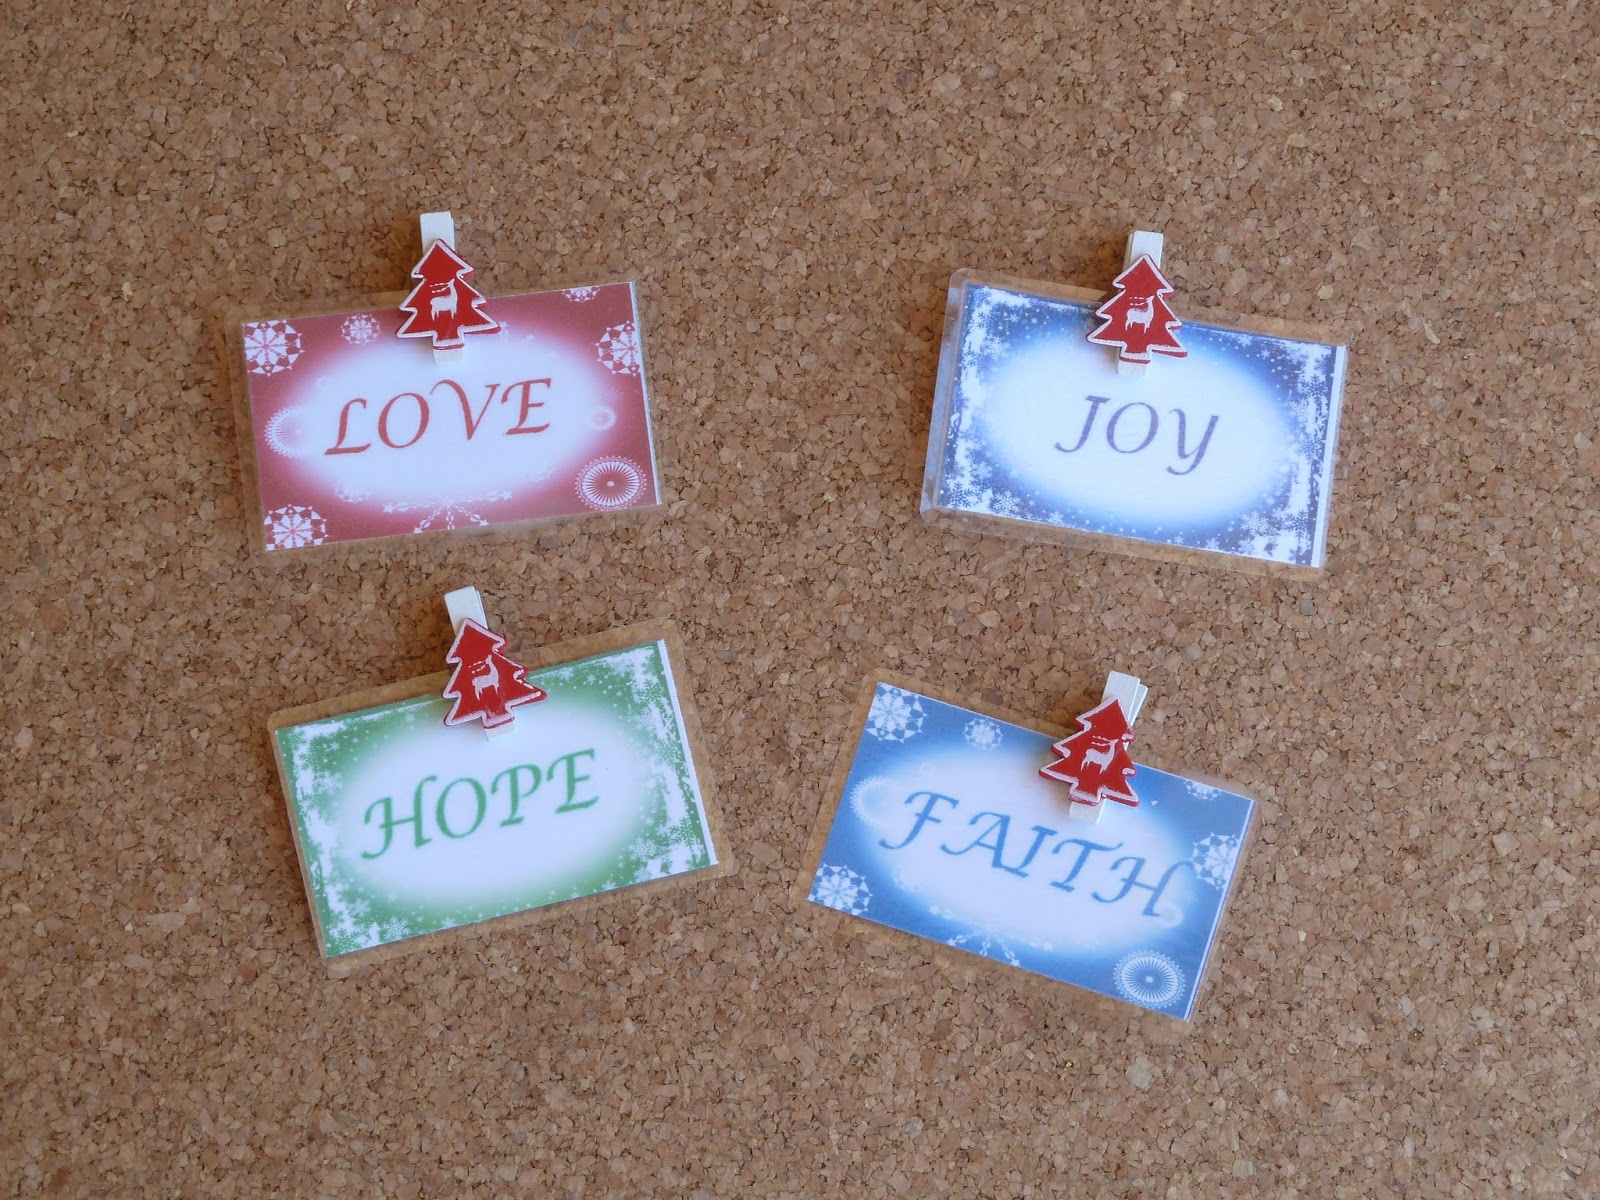
One of my clients was going through a difficult time during the year and she had little sticky notes everywhere around the house with the word "Love' written on them where she would see them and be reminded that the greatest thing is LOVE! I was inspired today to do something special for her Christmas gift when I see her on Monday.....here is the result. Depending where you want to put them you could either use blue tac or a small magnet on the back of the peg.


Instructions to make

Materials Needed

1 or 2 pages of Inkjet Business Card 
1 Packet of mini Christmas Card pegs
Laminated business card size pouches

The Use Of A....
laminator Machine
printer
Computer

Using Microsoft Word template for business cards.  Type the Word LOVE in a nice font.  Using a online photo editing site create a border or any decoration you want to add.  This was the site I used:-

http://www.pizap.com/pizap-app.php?initialstate=photo

Create your cards print allow a little time for the ink to dry.  Laminate each card. Add the peg.  That's all there is too it :)

I took my inspiration a little bit further with a Christmas theme  I really like these cute little pegs from the cheap shops I think they are meant to be used for hanging Christmas cards up. 

The ideas for creating different themes would be endless :)

Happy crafting   

Chrissie


Wednesday, 26 November 2014

Toilet Roll Cover


Australian/English terms used check on the net to adapt to American terms.


Materials:-  Materials:- 100% 8 ply cotton yarn in 3 different colours.  I had some left over from the 

face washer and another ball of the main colour one ball of each but not all was used.


Crochet Hook  3.00mm


Top

Using main colour (blue)

Make 4 chain and join in a ring with a slip stitch.

Round 1 

Make 3 ch (to represent the first treble); 11 tr into the ring.
Join to the top of the 3rd chain with a slip stitch.

Round 2

3 chain ; 1tr in the same place as ss; 2tr into the top of each tr of first
round.  Join with a ss (24 trebles)

Round 3

3 ch; 1 tr in the same place; (1 tr in the next tr, 2 tr in the following tr) 11 times;
1 tr in the next tr. Join  with a ss. (36 trebles).

Round 4

3 chain; 1 tr in the same place. ( 1 tr in each on the next 2 tr,  2 tr in the following treble)
11 times; 1 tr in each of the next 2 tr.  Join with ss (48 trebles)

Round 5

3 chain; 1 tr in the same place; ( 1 tr in each on the next 3 tr, 2 tr in the following tr) 11 times.
1 tr in each of the next 3 tr.  Join with a ss.  (60 trebles)  
Fasten Off.

Sides

Chain 74 in main colour & work four rows in linen stitch.

Using the linen stitch tutorial    http://www.lookatwhatimade.net/crafts/yarn/crochet/crochet-tutorials/crochet-linen-stitch/


Work 2 rows in linen stitch using 2nd contrast colour (white)

Work 2 rows in linen stitch using 3rd contrast colour (variegated)

Work 2 rows in linen stitch using 2nd contrast colour (white)

Change to main colour

Work 12 rows in linen stitch

Fasten Off

Weave in any ends.  Sew the sides together I used a clear fine thread.

Turn inside out.  Using DC join the top and the sides working
around evenly.

Brim

Round 1

In the bottom edge using main colour make 1 chain. then work 1 DC into each tr.
Join with a slip stitch.

Round 2

Make 3 chain (to represent the first treble);  (2 tr in next tr, 1 tr into each of next
4 tr).  Repeat to end.  Join with a slip stitch.

Round 3

Make 3 chain (to represent the first treble); (2 tr in next tr, 1 tr into each of next
5 tr).  Repeat to end.  Join with a slip stitch.

Round 4

Work evenly around a shell border - 1 DC skip 1 
5 trebles in next stitch - skip 1, 1 DC in next stitch repeat to end.


Any questions email me chrissy.matthews@gmail.com


Face Washer/Cloth Pattern


Inspired by this tutorial http://www.lookatwhatimade.net/crafts/yarn/crochet/crochet-tutorials/crochet-linen-stitch/

Materials:- 100% 8 ply cotton yarn in 3 different colours.  I had one ball of each but not all was used.

Crochet Hook 3.00m

Using main colour Chain 58

Work 4 rows in linen stitch using main (I used blue)

*Change to second colour (I used white)

Work 2 rows linen stitch.

Change to third colour (I used a varigated colour)

work 2 rows linen stitch.

Change to second colour (white)

Work 2 rown linen stitch.*

Change to main colour (blue)

Work 28 rows linen stitch.

Repeat from * to *

Change to main colour (blue)

Work 4 rows in linen stitch.

Complete by weaving in any ends.  I did a DC (SC - American) border
with 3 DC's in each corner.


Any questions email me chrissy.matthews@gmail.com

Thursday, 13 November 2014

My Shopping Bag

I used an eco-shopping bag like in this picture as a guide to the measurements of my bag.


Materials used:-
7 balls in main colour of Moda Vera Beetle Yarn (I used the Confetti variegated as pictured in the foreground)
1 ball of contrasting yarn (I used yellow which was one of the colours in the variegated yarn)


This is a 50% cotton 50% acrylic yarn very soft and nice to work with.
4 D-Link buckles
Piece of rope to the length you want for the handles
Piece of strong cardboard for the base lining
Yellow scrap material to cover the cardboard base
Fishing Line 0.28mm  I used this to sew on the buckles.

Abbreviations:-

DC (English/Australian)   SC American

INSTRUCTIONS

Front Panel
Using a 5.00 ml hook Chain 49
Change to 4.00 ml hook
1st row DC into 2nd chain from hook.  Continue DC to end of row.
2nd  row turn chain 1.  DC in first DC stitch continue DC to end of row.
Repeat until there is a total of 60 rows of DC.

Back Panel
Same as front panel above

Side 1
5.00ml hook
Chain 31
Change to 4.00ml hook
1st row DC into 2nd chain from hook.  Continue DC to end of row.
2nd row turn chain 1.  DC in first DC stitch continue DC to end of row.
Repeat until there is a total of 60 rows of DC.


Side 2
Same as 1st side as above

Base
Using a 5.00 ml hook Chain 49
Change to 4.00 ml hook
1st row DC into 2nd chain from hook.  Continue DC to end of row.
2nd  row turn chain 1.  DC in first DC stitch continue DC to end of row.
Repeat until there is a total of  30 rows.

Finshing Off
Weave in any ends on all the panels.  Pin seams together. 
Working with the contrasting yarn working on 2 pieces to be joined together
Joining together Using Double Crochet (Single Crochet American)
Wrong sides together for an outside seam.
Line up your pieces so the edges and patterns match.
Work seams just like a regular crochet row, from right to left.
Start by pushing your hook from front to back through both layers of the right hand corner chain space of your granny square (under the usual 'v' shape of the chains). Yarn over hook, then pull your hook back through to the front of your work. Make sure you don't lose the tail of yarn - hold onto it behind your work. Yarn over again and pull that new yarn over through both loops.
Now, holding your loose end along the top of your work push your hook through the next 2 stitches (under the 'v' of the square in front and the second square too). Yarn over and pull back through to the front of your work. Yarn over again and pull that new yarn over through both loops and you're making a single crochet seam. Your loose end will be hidden as you work your single crochet seam.
Continue working along the row until your 2 pieces are completely joined. Break your yarn and pull the end through the last loop to finish off.

Top edge
I used a bobble edging following the instructions here. However you could do a simple shell edging or whatever edging you prefer.

The Handles
I used these instructions to help make some nice strong handles for my bag.

Base Lining
Cover a piece of cardboard with some material using craft glue.

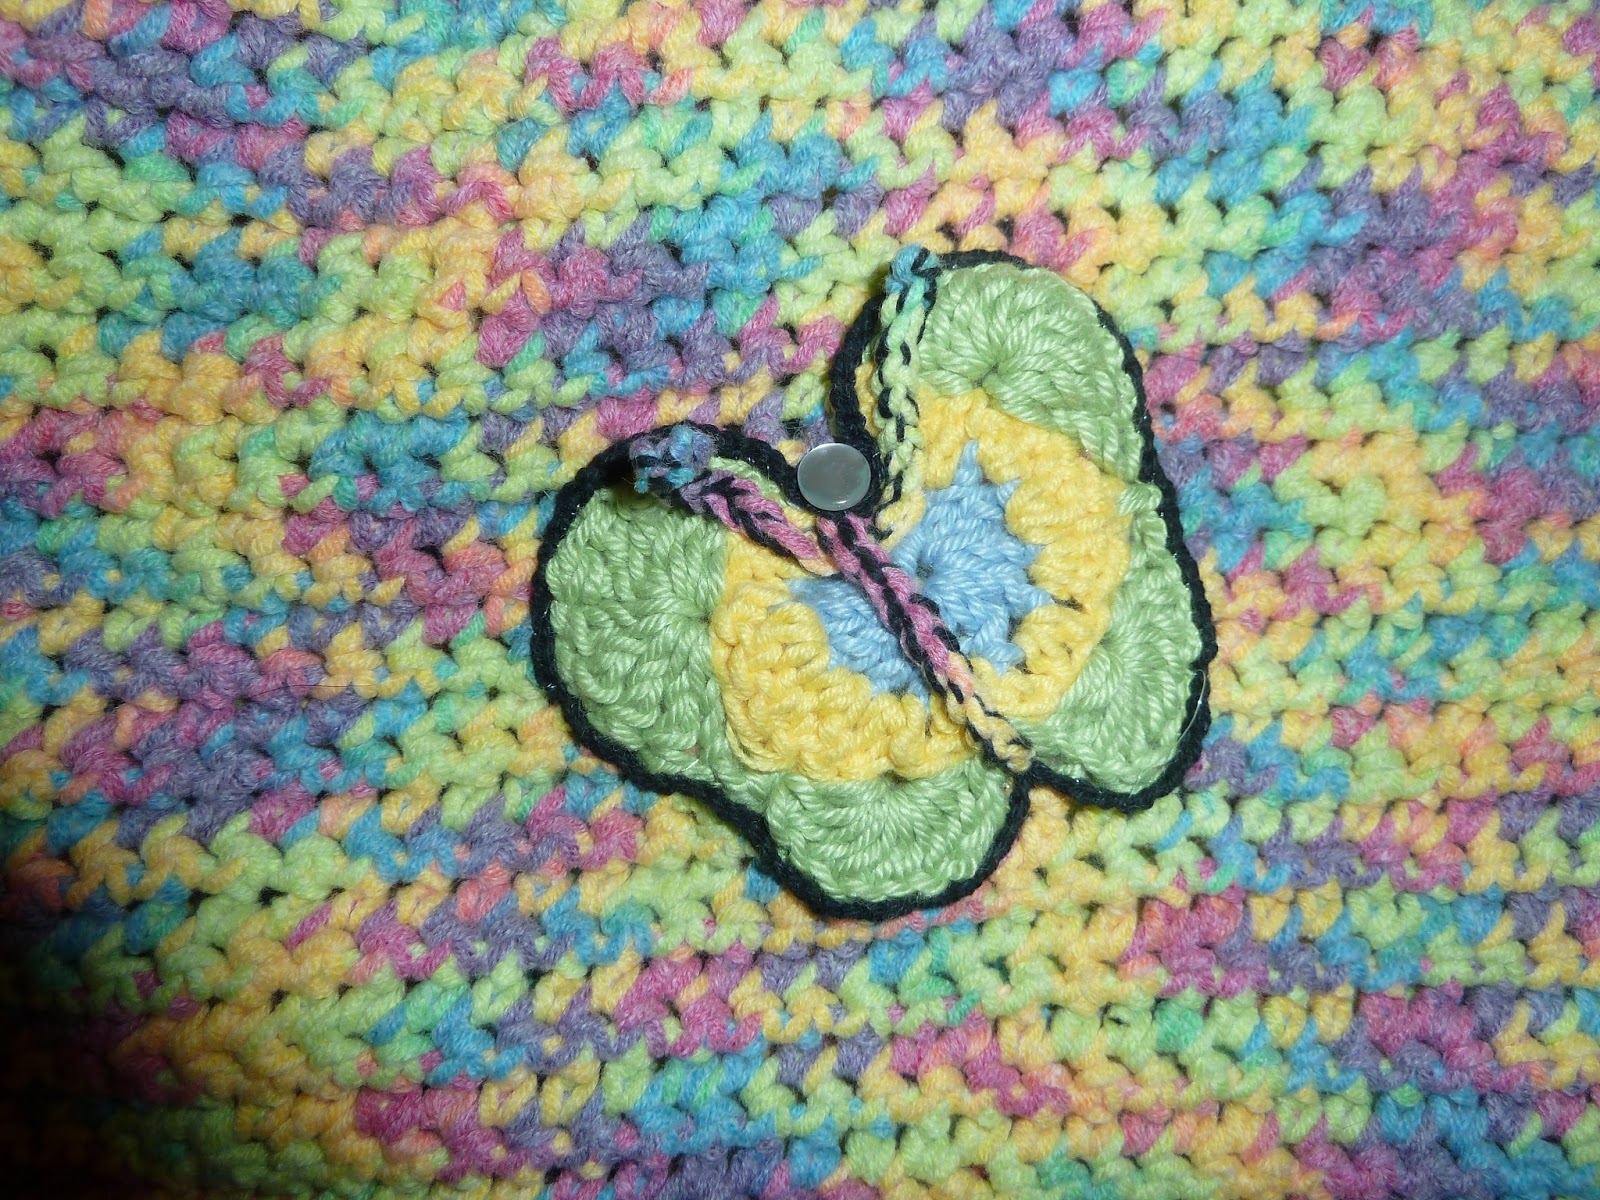
For a final finishing touch I did a crocheted butterfly but you could add a flower, owl or anything.  Lots of free appliqued patterns on the Internet.


I changed the butterfly as I thought it did not stand out much...so I used some black 4 ply cotton in  chain stitch to outlined it.


3rd May, 2015


As I sold my first bag.  I made a second bag with a couple of differences. 
In assembling the pieces together I used single crochet method as in the tutorial video clip here:- https://www.youtube.com/watch?v=DUe7rGpHXhc

I put the D Link buckles on the outside this time with some 4 tags I crocheted using left over Modra Vera Beetle coffetti yarn. 

As follows:-

Using 3.50 hook Chain 9

1 DC into second chain from hook to the end of the row.
Repeat until 12 rows finish off.

Make 4

Attach to the bag either with a running stitch or DC.

I did the cardboard base this time rather than material I crocheted 2 more base pieces the same as above.  Using DC to Join them together to cover the cardboard.


The second Bag


Any questions feel free to contact me. chrissy.matthews@gmail.com